P.02 Experimental Skills
Chapter 1
AS-Biology-Practical-Workbook-Qs-Google-DocsChapter 2
Chapter-2-AS-Biology-Practical-Workbook-Q-1-1Simple Dilutions
Introduction
A dilution is the process of reducing the concentration of a solution by mixing it with a diluent (such as distilled water or buffer). Dilutions are essential in biology for experiments that require a range of concentrations—whether you’re preparing serial dilutions for a standard curve or simply reducing the strength of a stock solution for an assay.
Materials Needed
- Stock Solution: The concentrated solution you wish to dilute.
- Diluent: A liquid (e.g., distilled water, buffer) used to decrease the concentration of the stock solution.
- Pipettes and Pipette Tips: For accurately measuring small volumes.
- Volumetric Flask or Test Tubes: For mixing and holding the final diluted solution.
- Mixing Device: Vortex mixer or manual shaking to ensure thorough mixing.
- Labels and Marker: For clearly labeling the new dilution.
Step-by-Step Procedure
1. Determine the Dilution Factor
- Dilution Factor (DF): This is the ratio of the final volume to the volume of the stock solution used.
- Example: For a 1:10 dilution, the dilution factor is 10 (i.e., 1 part stock solution to 9 parts diluent).
2. Use the Dilution Formula
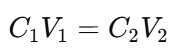
The dilution formula is:

Where:
- C1 = initial concentration (stock solution)
- V1 = volume of the stock solution needed
- C2 = final concentration (after dilution)
- V2 = final total volume
3. Calculate the Required Volumes
- Example Calculation for a 1:10 Dilution:
- Suppose you need a final volume (V2) of 10 mL.
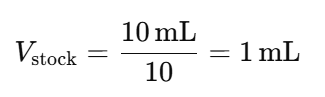
- The volume of stock solution (V1) required is:

- Then, add the diluent to reach a total volume of 10 mL: Volume of Diluent=V2 − V1 = 10 mL − 1 mL = 9 mL
4. Transfer the Stock Solution
- Use a pipette to carefully measure and transfer 1 mL of the stock solution into a clean test tube or volumetric flask.
5. Add the Diluent
- Using another pipette or a graduated cylinder, add 9 mL of your chosen diluent to the container with the stock solution.
6. Mix Thoroughly
- Vortex or shake the container gently to ensure that the stock solution and diluent mix completely, forming a homogeneous solution.
7. Label the Dilution
- Clearly label the container with details such as:
- Dilution factor (e.g., 1:10)
- Date of preparation
- Any other relevant information (e.g., sample ID)
Additional Tips
- Accuracy: Use calibrated pipettes to ensure precise volume measurements.
- Consistency: Always mix thoroughly to guarantee a uniform solution.
- Documentation: Record your dilution calculations and procedures in your lab notebook.
Making Dilutions Using a Dilution Factor
1. Understanding the Dilution Factor
- Definition:
A dilution factor tells you how many times you are diluting the original (stock) solution. For example, a dilution factor of 10 (often written as 1:10) means that one part of the stock solution is mixed with nine parts of the diluent, making a total of 10 parts. - Why It’s Important:
It allows you to prepare a solution with a lower concentration, which is essential when working with highly concentrated substances or when you need a series of dilutions for experiments like creating a standard curve.
2. The Dilution Formula
Use the following formula to calculate the volumes needed:
Where:
- C1 = concentration of the stock solution
- V1 = volume of the stock solution needed
- C2 = concentration of the diluted solution
- V2 = total volume of the diluted solution
For a dilution factor (DF), the relationship is:

3. Step-by-Step Procedure
Step 1: Decide on Your Dilution Factor and Final Volume
- Example:
You need a 1:10 dilution (DF = 10) with a final volume (V2) of 10 mL.
Step 2: Calculate the Volume of Stock Solution (V1)
- Use the formula:

- Calculation:

Step 3: Calculate the Volume of Diluent Needed
- Subtract the volume of the stock solution from the final volume: Volume of Diluent = V2 − V1 = 10 mL − 1 mL = 9 mL
Step 4: Prepare the Dilution
- Measure the Stock Solution:
Use a calibrated pipette to measure 1 mL of your stock solution. - Transfer:
Transfer the measured stock solution into a clean test tube or volumetric flask. - Add the Diluent:
Use another pipette or a graduated cylinder to add 9 mL of diluent (e.g., distilled water or a buffer) to the container. - Mix Thoroughly:
Gently vortex or invert the container several times to ensure the solution is homogeneous.
Step 5: Label the Diluted Solution
- Clearly label the container with:
- The dilution factor (e.g., 1:10)
- The date
- Any additional relevant information (e.g., sample ID)
4. Additional Tips
- Accuracy:
Always use calibrated pipettes and volumetric flasks to ensure precise measurements. - Consistency:
Mix thoroughly to achieve a uniform solution. - Documentation:
Record your calculations and dilution procedure in your lab notebook for future reference.
Example Summary
Goal: Make a 1:10 dilution with a final volume of 10 mL.
- Stock Volume (V1): 1 mL
- Diluent Volume: 9 mL
- Procedure:
- Measure 1 mL of the stock solution.
- Add 9 mL of diluent.
- Mix thoroughly.
- Label the container appropriately.
Making Serial Dilutions
Introduction
Serial dilution is a technique used to create a series of solutions with progressively lower concentrations from a single, high-concentration stock solution. This method is essential in biology and chemistry for preparing samples for assays, creating standard curves, or reducing concentrations to a level that is suitable for experimental analysis.
Materials and Equipment
- Stock Solution: The concentrated solution that you want to dilute.
- Diluent: A solvent (e.g., distilled water, buffer solution) used to lower the concentration.
- Pipettes and Pipette Tips: For accurate measurement and transfer of liquids.
- Microcentrifuge Tubes or Test Tubes: Containers for each dilution step.
- Vortex Mixer or Manual Shaking: To ensure thorough mixing at each dilution step.
- Labels and Permanent Marker: To clearly label each dilution tube with the dilution factor and concentration.
Step-by-Step Procedure
1. Determine the Dilution Factor for Each Step
- Dilution Factor (DF):
The ratio by which the stock solution is diluted in each step. For example, a DF of 10 means that 1 part of the solution is mixed with 9 parts diluent, making the total volume 10 parts. - Example Setup:
Suppose you want to make a series of 1:10 dilutions. This means:- Tube 1: 1:10 dilution
- Tube 2: 1:100 (which is 1:10 from Tube 1 followed by another 1:10 dilution)
- Tube 3: 1:1,000, and so on.

2. Plan the Dilution Series
- Total Volume per Tube:
Decide on the final volume of each dilution. For instance, if you choose 10 mL per tube:- For a 1:10 dilution, you’ll need 1 mL of the previous solution and 9 mL of diluent in each step.
3. Perform the First Dilution
- Measure the Stock Solution:
Using a pipette, measure 1 mL of your stock solution. - Transfer to the First Tube:
Transfer the 1 mL into a clean tube. - Add Diluent:
Add 9 mL of your diluent to the tube. - Mix Thoroughly:
Vortex or invert the tube several times to ensure the solution is homogeneous.
This tube now contains a 1:10 dilution of the original stock.
4. Perform Subsequent Dilutions (Serial Steps)
- Transfer from Previous Tube:
Using a fresh pipette tip, measure 1 mL from the 1:10 dilution tube. - Prepare the Next Tube:
Place the 1 mL into a new, clean tube. - Add Diluent:
Add 9 mL of diluent to the new tube. - Mix Thoroughly:
Vortex or invert the tube to mix. This second tube now represents a 1:100 dilution of the original stock (1:10 × 1:10). - Repeat the Process:
Continue transferring 1 mL from the previous tube into a new tube containing 9 mL of diluent until you reach the desired number of dilutions.
5. Labeling and Documentation
- Label Each Tube:
Clearly mark each tube with the corresponding dilution factor (e.g., 1:10, 1:100, 1:1,000). - Record Calculations:
Document your dilution scheme, including the volumes used and the expected final concentrations. This helps ensure reproducibility and clarity in your experimental records.
Calculations and Considerations
- Dilution Formula:
The general dilution formula is: C1V1=C2V2
Where:- C1 = initial concentration
- V1 = volume of the stock solution added
- C2 = final concentration after dilution
- V2 = final total volume
- Example Calculation:
For a 1:10 dilution, if the stock solution has a concentration of 100 mg/mL:

subsequent dilutions, the concentration decreases by a factor of 10 each time:
- 1:100 dilution: 1 mg/mL
- 1:1,000 dilution: 0.1 mg/mL, and so on.
Additional Tips
- Accuracy in Measurement:
Use calibrated pipettes and ensure that your diluent and stock solution are mixed thoroughly. - Avoid Cross-Contamination:
Always use a new pipette tip for each transfer. - Thorough Mixing:
Insufficient mixing may lead to inaccurate dilution results. - Documentation:
Write down every step, including volumes and dilution factors, in your lab notebook.
Conclusion
Serial dilutions allow you to create a series of solutions with known, decreasing concentrations, which is vital for many biological and chemical experiments. By carefully following these steps—determining the dilution factor, planning the series, performing each dilution, and recording your process—you can achieve accurate and reproducible dilutions. This method is essential for experiments such as creating standard curves, determining microbial counts, or conducting enzyme kinetics assays.
Make Serial Dilutions from a Stock Solution with x% Concentration
Introduction
When you have a stock solution with a known concentration (x%), you may need to prepare a series of diluted solutions for experiments such as establishing a standard curve or reducing the concentration to a measurable range. Serial dilutions are a stepwise method that reduces the concentration by a consistent factor (e.g., 1:10) at each step.
Materials Needed
- Stock Solution: Your original solution with x% concentration.
- Diluent: Typically distilled water or an appropriate buffer.
- Pipettes and Pipette Tips: For accurate measurement of small volumes.
- Volumetric Flasks or Test Tubes: For mixing the dilutions.
- Vortex Mixer or Manual Shaker: To ensure thorough mixing.
- Labels and Marker: To label each dilution with its corresponding concentration.
Step-by-Step Procedure
1. Determine the Dilution Factor
- Dilution Factor (DF):
This is the ratio by which you dilute your stock solution at each step. For example, a 1:10 dilution means you mix 1 part stock solution with 9 parts diluent.
2. Calculate the Volumes
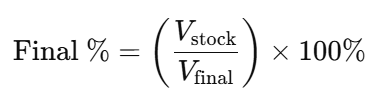
For each dilution step, you’ll use the formula:

Where:
- Vstock = volume of the stock (or previous dilution) solution used.
- Vfinal = final volume of the dilution.
Example Setup:
- Desired Final Volume per Tube: 10 mL
- Dilution Factor: 1:10 (DF = 10)
Then, for each dilution:
3. Prepare the First Dilution
- Measure the Stock Solution:
Use a pipette to measure 1 mL of the x% stock solution. - Transfer:
Place the 1 mL into a clean test tube or volumetric flask. - Add Diluent:
Add 9 mL of diluent to the tube. - Mix Thoroughly:
Vortex or invert the tube several times to ensure the solution is homogeneous. This first tube now contains a 1:10 dilution of the stock solution. If your stock was x%, the new concentration is:

4. Perform Subsequent Dilutions
To prepare further dilutions (e.g., 1:100, 1:1,000, etc.):
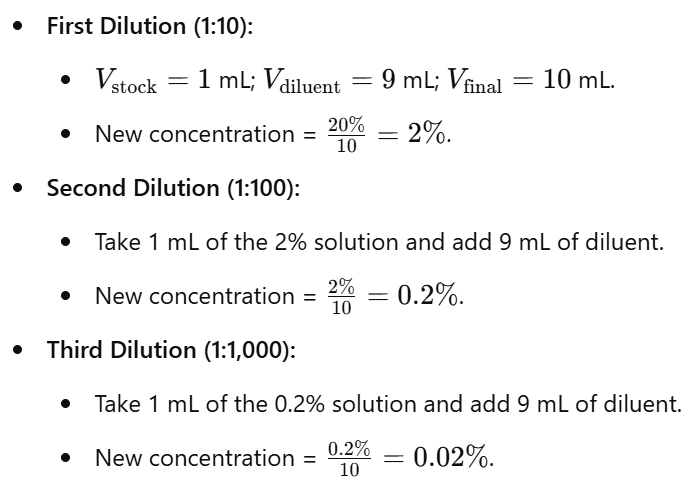
- Second Dilution (1:100):
- Measure 1 mL from the 1:10 dilution.Transfer this 1 mL into a new, clean tube.Add 9 mL of diluent.Mix thoroughly.

- Continue the Process:
- For a 1:1,000 dilution, take 1 mL from the 1:100 dilution, add 9 mL of diluent, and mix.

5. Label and Document
- Label Each Tube:
Mark each tube with its dilution factor and the resulting concentration.
Example:

- Record the Process:
Write down your calculations, the volumes used, and the dilution series in your lab notebook.
Example Calculation
Let’s assume you have a stock solution of 20% (x = 20%).
Additional Tips
- Accuracy:
Use calibrated pipettes to ensure precise volume measurements. - Consistency:
Mix each dilution thoroughly to ensure uniform concentration. - Avoid Cross-Contamination:
Use a fresh pipette tip for each transfer. - Documentation:
Clearly record each step, including volumes and calculated concentrations, for reproducibility.
Conclusion
Serial dilutions are a powerful tool to create a range of solution concentrations from a single stock solution. By following this guide—determining the dilution factor, calculating the volumes, performing each dilution step carefully, and documenting your process—you can reliably prepare serial dilutions with a stock solution of any given percentage (x%). This method is essential in many biological and chemical assays and ensures that your experimental results are accurate and reproducible.
Percentage Dilutions
Definition & Purpose
- Definition:
Percentage dilutions express the concentration of a solution as a percentage (e.g., 1% w/v or 1% v/v). For example:- 1% w/v (weight/volume):
- This means 1 gram of solute is dissolved in enough solvent to make 100 mL of solution. For example, a 1% w/v saline solution contains 1 gram of salt per 100 mL of water.
- 1% v/v (volume/volume):
- This means 1 mL of liquid solute is mixed with enough solvent to make 100 mL of solution. For example, a 1% v/v ethanol solution contains 1 mL of ethanol per 100 mL of the final solution.
- 1% w/v (weight/volume):
- Purpose:
This method is used when the concentration is described as a percentage, and you need to adjust the proportion of solute to solvent directly.
Procedure
- Determine the Required Percentage:
Decide the target percentage concentration. - Calculate the Volumes:
Use the formula:
- Measure and Mix:
Measure the appropriate volume of the stock solution and add the required volume of diluent to achieve the final volume.
Example
- Stock: 10% solution
- Target: 1% solution
- Final Volume: 100 mL
- Calculation:

Key Tips
- Ensure that units (e.g., mL) are consistent.
- Label the final solution with the correct percentage.
- Mix thoroughly to ensure uniformity.
Making Percent Solutions (w/v)
Definition: Weight/Volume Percent (% w/v)
- Formula:
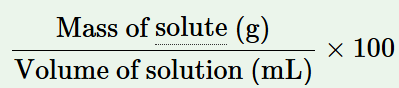
- This means that a 5% (w/v) solution contains 5 grams of solute in every 100 mL of the solution.
Steps to Prepare a Percent Solution
- Determine the Desired Concentration:
Identify the percentage concentration required, for example, 5% (w/v). - Write the Concentration Fraction:
For a 5% (w/v) solution, the ratio is:

- Set Up a Proportion for the Desired Volume:
To prepare 500 mL of the solution, set up the proportion:

- Solve for the Mass of Solute:
Multiply both sides of the equation to find xxx:

- Prepare the Solution:
- Weigh out 25 g of dry sucrose.
- Transfer the sucrose to a 500 mL graduated cylinder.
- Add deionized (DI) water gradually to dissolve the sucrose.
- Once the solute is completely dissolved, add more DI water until the total solution volume reaches 500 mL.